NIC Teaming
Jump to navigation
Jump to search

NIC Teaming, also known as load balancing and failover (LBFO), allows multiple network adapters on a computer to be placed into a team.
NIC Teaming requires the presence of a single Ethernet network adapter, which can be used for separating traffic that is using VLANs. All modes that provide fault protection through failover require at least two Ethernet network adapters.
Two or more physical network adapters are connected to the NIC Teaming solution multiplexing unit, which then presents one or more virtual adapters (also known as team network adapters) to the operating system. There are several different algorithms that distribute inbound and outbound traffic between the physical network adapters.
Goals
Configure NIC teaming for the server's two physical interfaces
- Bandwidth aggregation
- Traffic failover to prevent connectivity loss in the event of a network component failure
Verify Network Team Status
Procedures
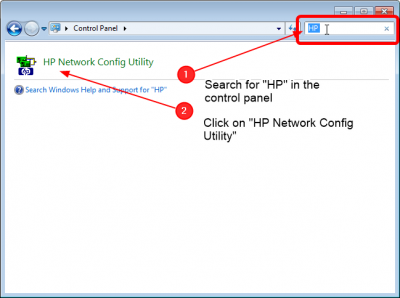
Open the HP Network Config Utility

- Open the Control Panel
- Search for HP'
- Click on HP Network Config Utility
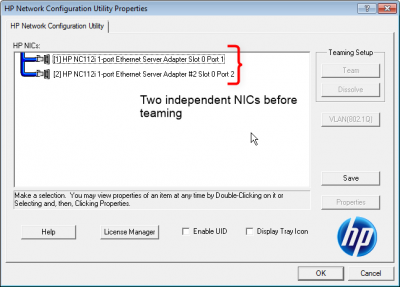
Observe the current NIC state

- Observe that the two NICs are independent at the moment
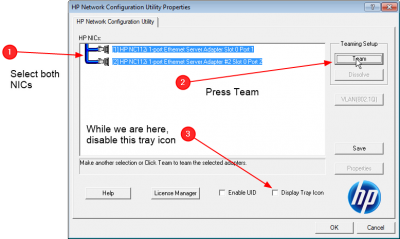
Select NICS for Teaming

- Select both NICs
- Since we are on this page already, go ahead and uncheck the Display Tray Icon
- Press the Team Button
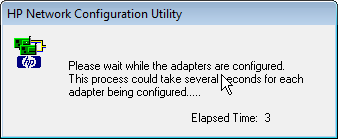
Wait for Teaming to complete

- Now we wait. Should be less than a minute.
Teaming complete, but status is Failed

- At this point the Teaming creation is complete, but the status is reported as failed.
- This is because we Didn't connect any cables yet
- NIC teaming requires that both physical interfaces are enabled in windows, and connected to the same switch
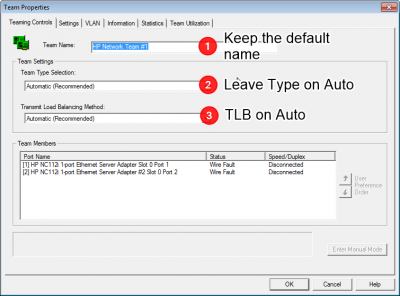
Before going on, verify config

- When you click on Properties You get to this page
- Verify the Default settings
- Team name is HP Network Team #1
- Team Type is Automatic
- Transmit Load Balacing Method is Automatic
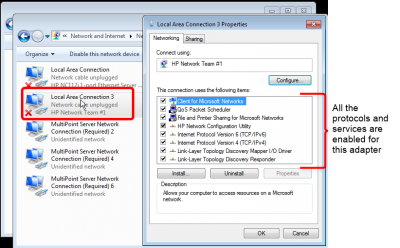
Observe a new Network Adapter

- Now that we teamed the two physical adapter, we should now see a new virtual Network adapter
- Note that the two original NICs are still there with the default names Local Area Connection and Local Area Connection 2
- The new Team NIC is named by default Local Network Connection 3
- The description is HP Network Team #1
- Also observe that for this adapter, all the protocols and services are enabled
- See the Networking Configuration page for details
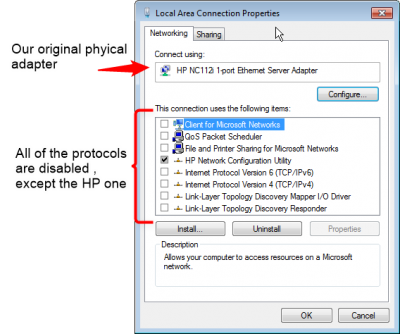
The physical NICs should look like this

- Now if you look at the Properties for Local Area Connection (the first one), you'll see it mostly looks disabled.
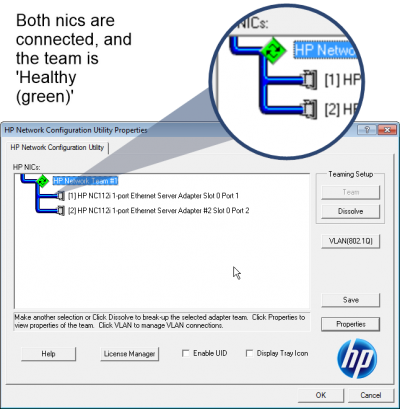
Plug in the interfaces

- Plug the two network cables into the same switch
- If you are using two or more switches make sure there is an uplink connection between them
- When NIC Teaming is complete you should see a green icon here
Remove the NIC Teaming UI from Startup
Don't Worry about the License Manager
- You may see references to the License Manager in the network config. You need not worry about this. There is an additional feature called Accelerated iSCSI which we have no use for, but would require adding a license if we did