HP P1606dn Printer Setup
Jump to navigation
Jump to search
Goals
Configure the printers with a Static IP
By default the printer will take a DHCP address, but since we want to reliably reach the printer over the network we want to specific a an IP address.
- Printer IP: 192.168.1.10
Add a DNS entry for the printer
DNS allows us to address computers by name instead of remembering their IP addresses.
Specify an administrator password
Add a password to access the printer's web UI. Just a precaution to prevent tampering
- username: admin
- password: Standard password, See Security Considerations
Procedures
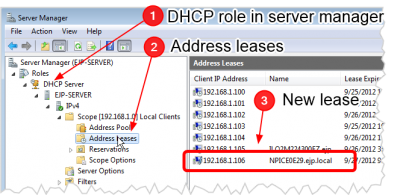
Let Printer acquire a DHCP address

- Connect the printer to the network with the server
- Wait for a moment for the printer to acquire a DHCP IP address
- Open the Server Manager and look for the new lease
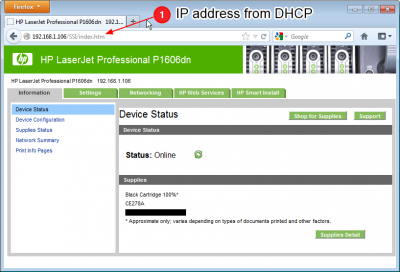
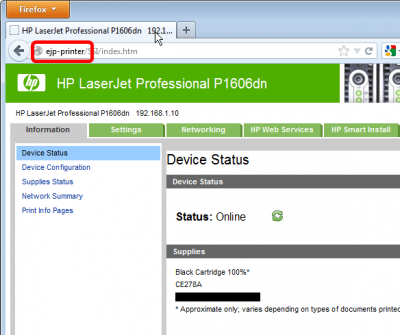
Open the Web interface

- Open a web Browser, like Firefox
- In the address bar, type the IP address from the new DHCP lease
- Observe that you are now at the web interface to manage the printer
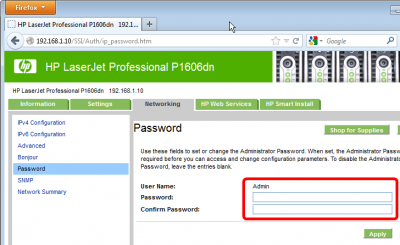
Enable the Admin password

- Navigate to Netowrking->Password
- Specify the administrator password, See Security Considerations
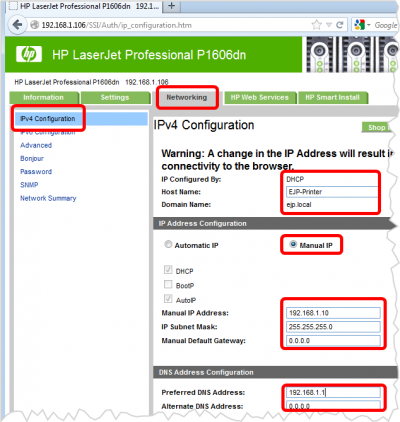
Set the IPv4 settings

- Navigate to the Networking ->IPv4
- Specify the name EJP-Printer
- Select Manual IP
- Specify the follwoing:
- Manual IP Address: 192.168.1.10
- IP Subnet Mask: 255.255.255.0
- Manual Default Gateway: 0.0.0.0
- Preferred DNS Address: 192.168.1.1
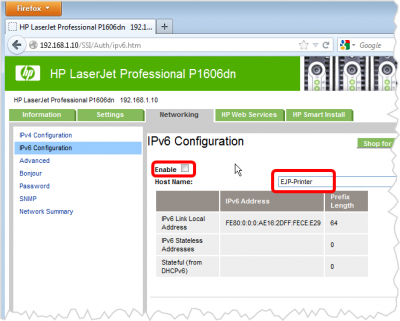
Disable IPv6

- Navigate to the IPv6 Menu
- Uncheck enable
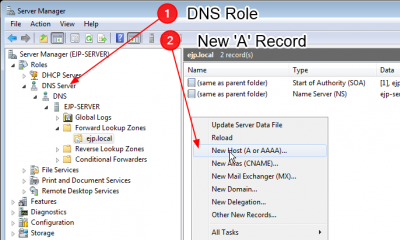
Create new DNS entry

- Open the DNS role in the Server Manager
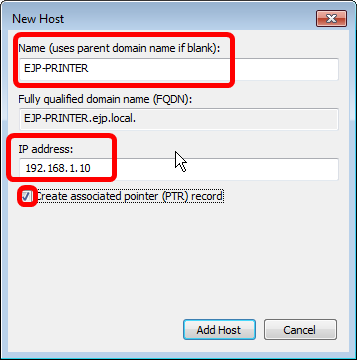
Specify the address details

- Specify the Name
- Specify the IP address
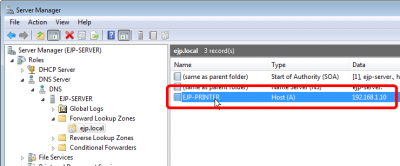
Observe the new record

- You should now see a new record in the list

- Open the browser again
- Type ejp-printer in the address bar and confirm the page loads